
创建EurekServer
创建一个springboot项目,并引入依赖web eurekserver hystrix-dashboard,'security'
        <dependency>
            <groupId>org.springframework.boot</groupId>
            <artifactId>spring-boot-starter-web</artifactId>
        </dependency>
        <dependency>
            <groupId>org.springframework.cloud</groupId>
            <artifactId>spring-cloud-starter-netflix-eureka-server</artifactId>
        </dependency>
        <dependency>
            <groupId>org.springframework.cloud</groupId>
            <artifactId>spring-cloud-starter-netflix-hystrix-dashboard</artifactId>
        </dependency>
        <dependency>
            <groupId>org.springframework.boot</groupId>
            <artifactId>spring-boot-starter-security</artifactId>
        </dependency>
        <dependency>
            <groupId>org.springframework.boot</groupId>
            <artifactId>spring-boot-starter-test</artifactId>
            <scope>test</scope>
        </dependency>
        <dependency>
            <groupId>org.springframework.boot</groupId>
            <artifactId>spring-boot-starter-security</artifactId>
        </dependency>
修改配置文件,更改端口号以及配置security
server:
  port: 8761
spring:
  application:
    name: registry
  security:
    user:
      name: zhou
      password: 12345678
eureka:
  client:
    register-with-eureka: false
    fetch-registry: false
    serviceUrl:
      defaultZone: http://zhou:12345678@localhost:${server.port}/eureka/
然后修改启动类
@SpringBootApplication
@EnableEurekaServer
@EnableHystrixDashboard
public class RegistryApplication {
    public static void main(String[] args) {
        SpringApplication.run(RegistryApplication.class, args);
    }

}
然后建立一个zuul的网关引入pom文件
   <dependency>
            <groupId>org.springframework.cloud</groupId>
            <artifactId>spring-cloud-starter-netflix-eureka-client</artifactId>
        </dependency>
        <dependency>
            <groupId>org.springframework.cloud</groupId>
            <artifactId>spring-cloud-starter-netflix-zuul</artifactId>
        </dependency>
对yml文件进行配置,修改端口号,增加application name
server:
  port: 8888
spring:
  application:
    name: proxy
eureka:
  client:
    serviceUrl:
      defaultZone:  http://zhou:12345678@localhost:8761/eureka
然后写一个user的项目来进行测试,使用的是h2和jpa
建立domain类
@Entity(name = "customer")
public class Customer {
    @Id
    @GeneratedValue
    private Long userId;
    private String password;
    private String userName;
    public Long getUserId() {
        return userId;
    }
    public void setUserId(Long userId) {
        this.userId = userId;
    }
    public String getPassword() {
        return password;
    }
    public void setPassword(String password) {
        this.password = password;
    }
    public String getUserName() {
        return userName;
    }
    public void setUserName(String userName) {
        this.userName = userName;
    }
}
建立CustomerRepositry,因为就是一个测试,所以只是继承了JpaRepository
public interface CustomerRepositry extends JpaRepository<Customer,Long> {
}
service
@Service
public class CustomerService {
    @Resource
    private CustomerRepositry customerRepositry;
    //根据id 查询用户
    public Optional<Customer> getCustomerById(Long id){
        return customerRepositry.findById(id);
    }
    //查询用户信息
    public List<Customer> getAllCustomer(){
        return customerRepositry.findAll();
    }
    //保存用户信息
    public void save(Customer customer){
        customerRepositry.save(customer);
    }
}
controller
@RestController
@RequestMapping("/user/test")
public class CustomerController {
@Resource
private CustomerService customerService;
@Resource
private OrderClient orderClient;
@PostConstruct
public void init(){
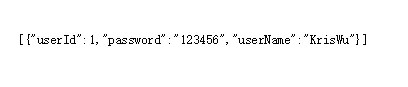
Customer customer = new Customer();
customer.setUserId(1L);
customer.setUserName("KrisWu");
customer.setPassword("123456");
customerService.save(customer);
}
@RequestMapping("getCustomer")
public List<Customer> getCustomer(){
return customerService.getAllCustomer();
}
@RequestMapping("getOrder")
@HystrixCommand
public Map getOrder(){
Optional<Customer> customer = customerService.getCustomerById(1L);
String orderDetail = orderClient.getMyOrder(1L);
Map map = new HashMap();
map.put("customer",customer);
map.put("orderDetail",orderDetail);
return map;
}
启动项目出现了报错
ERROR 11612 --- [tbeatExecutor-0] com.netflix.discovery.DiscoveryClient : *****:***** - was unable to send heartbeat!
这个错误是在2.0以上会出现的。是因为security默认启用了csrf检验,要在eurekaServer端配置security的csrf检验为false。
所以在repostory中新建一个config文件
@EnableWebSecurity
public class WebSecurityConfig extends WebSecurityConfigurerAdapter {
    @Override
    protected void configure(HttpSecurity http) throws Exception {
        http.csrf().disable();
        super.configure(http);
    }
}
然后通过proxy的地址来访问user的项目
访问地址(http://localhost:8888/user/user/test/getCustomer)
然后发现可以显示增加的用户信息
然后再新建一个order的项目,想要达到的想过是可以在user的项目中直接调用order中的方法,这里和user基本上是差不多的,就不贴代码了
重要的地方是在user的项目中,新建一个类OrderClient
@FeignClient(value = "order",path = "/order/test")
public interface OrderClient {
    @GetMapping("/{id}")
    String getMyOrder(@PathVariable(name = "id")Long id);
}
主要就是通过这个类进行连接
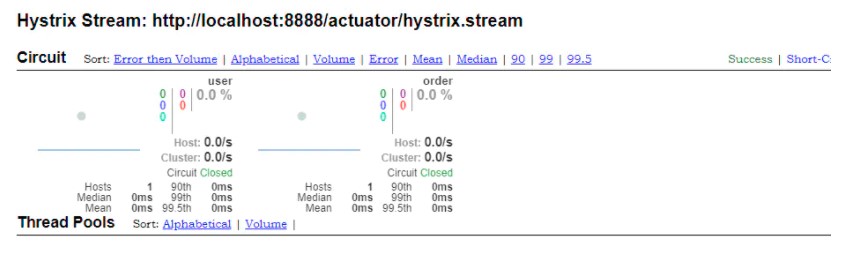
然后启动项目,进行测试

动力节点在线课程涵盖零基础入门,高级进阶,在职提升三大主力内容,覆盖Java从入门到就业提升的全体系学习内容。全部Java视频教程免费观看,相关学习资料免费下载!对于火爆技术,每周一定时更新!如果想了解更多相关技术,可以到动力节点在线免费观看SpringCloud入门视频教程哦!
 代码小兵988
67篇文章贡献228982字
代码小兵87208-09 15:04
代码小兵99203-29 17:29
杨晶珍08-02 11:09
代码小兵98808-09 14:38
代码小兵28608-09 14:50


 京公网安备 11030102010736号